
How to Use Contact Scanner on iOS
Contact Scanner is a paid add-on. Only Mobile Locker can activate it for your team—you cannot turn it on yourself. Contact your Mobile Locker account manager to enable it or to add users.
Contact Scanner lets you photograph a name badge, business card, note, or any text with someone’s contact details—printed or handwritten—and turn it into an identified, enriched contact. The app reads text, not faces.
At a congress, use Congresses → Capture lead → Scan Attendee when you want the scan linked to that event. Prefer a QR badge when one is available: a successful badge/QR lookup returns lead-retrieval data and saves the attendee immediately. If the photo has no readable code (or the event has no badge provider), Contact Scanner’s AI path runs automatically in the background—you may see Reading text and identifying person…—then a Review Results screen before you save the attendee.
Before you start
- Contact Scanner must already be activated for your team by Mobile Locker, and your user must be allowed to use it. If you do not see Contact Scanner, contact your Mobile Locker account manager (or your administrator, who can confirm with Mobile Locker)—your team cannot enable the add-on on its own.
- You need a network connection to identify and enrich a scan.
- Camera permission is required for Scan with Camera. Photo library permission is required for Select from Photos / Choose from Library.
Business Cards is still available in this release for teams that use it. For new capture work, prefer Contact Scanner (standalone) or Scan Attendee at a congress. A future release is expected to replace Business Cards with Contact Scanner and carry existing cards forward.
Where to find Contact Scanner
Depending on your device and tab layout, open Contact Scanner from the tab bar, the sidebar, or More. The tab title is Contact Scanner.
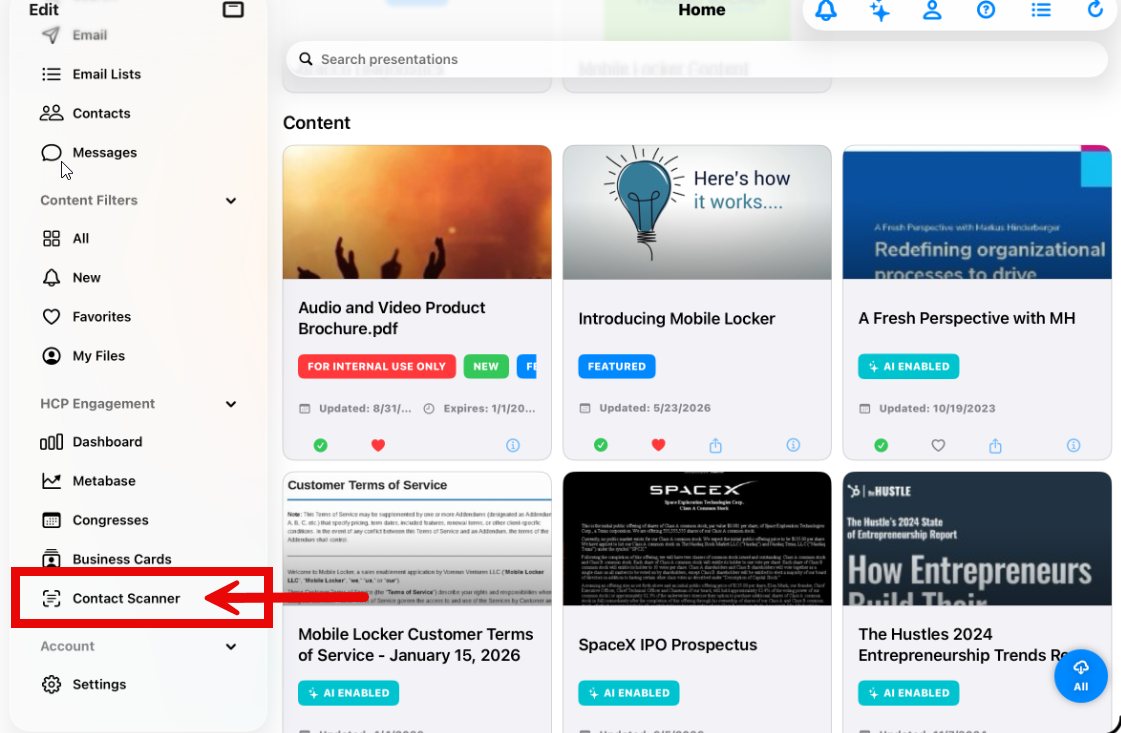
At the top of the Contact Scanner list, you may see: Congresses > Use Congresses → Scan Attendee instead so this links to your event.
Scan from the Contact Scanner tab
- Open Contact Scanner.
- If the list is empty, tap Scan Now. If you already have history, tap Scan in the toolbar.
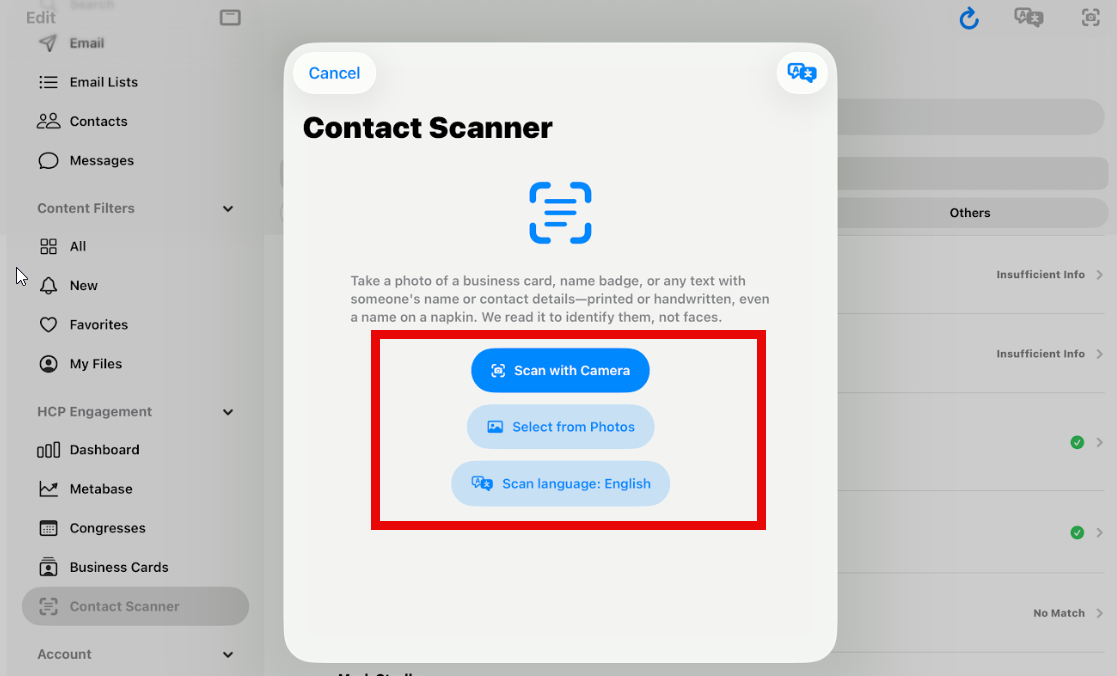
- On the Contact Scanner screen, choose:
- Scan with Camera — take a photo of the badge, card, or text, or
- Select from Photos — pick an existing photo.
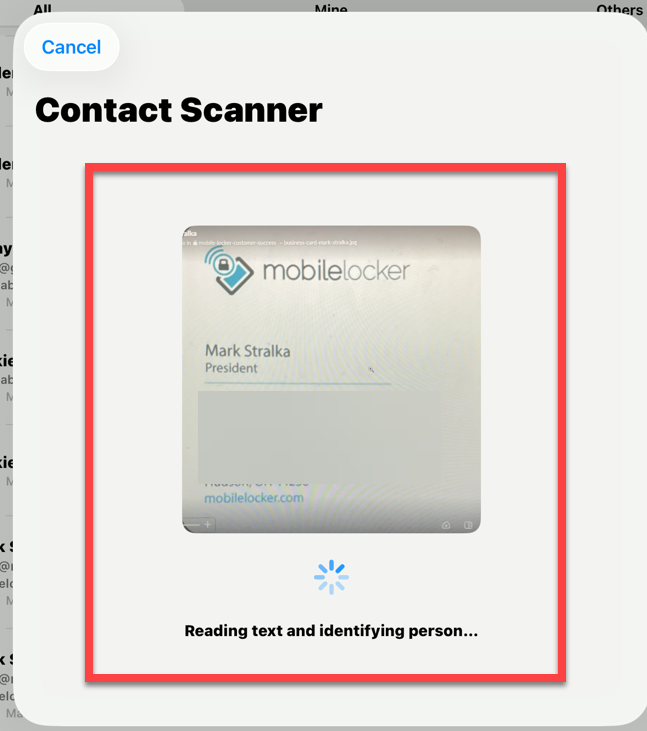
- Wait while the app works. Status messages may include Uploading image…, then Reading text and identifying person…. This can take a short while (often several seconds; sometimes longer).
- When identification finishes, you can review and edit the result (Edit Scan), then save.
Optional: set Scan Language (toolbar or Scan language: … on the idle screen) so text is read in the language you expect. Your choice is remembered for the next scan.
Your scan history
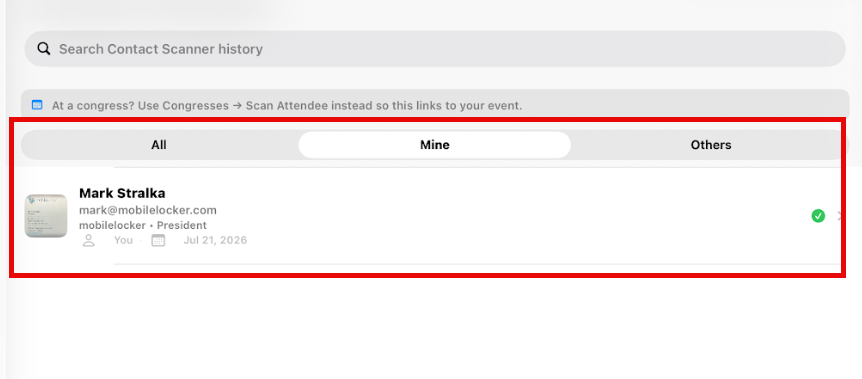
On Contact Scanner you can:
- Search history (Search Contact Scanner history).
- Filter All / Mine / Others when more than one person’s scans are on the team list.
- Open a row for detail, swipe Delete to remove a scan, or use the toolbar refresh control.
Empty state title: No Contact Scans Yet.
At a congress: Scan Attendee
Use this when the lead should be tied to the event attendee list.
- Open Congresses and open your event’s attendee list.
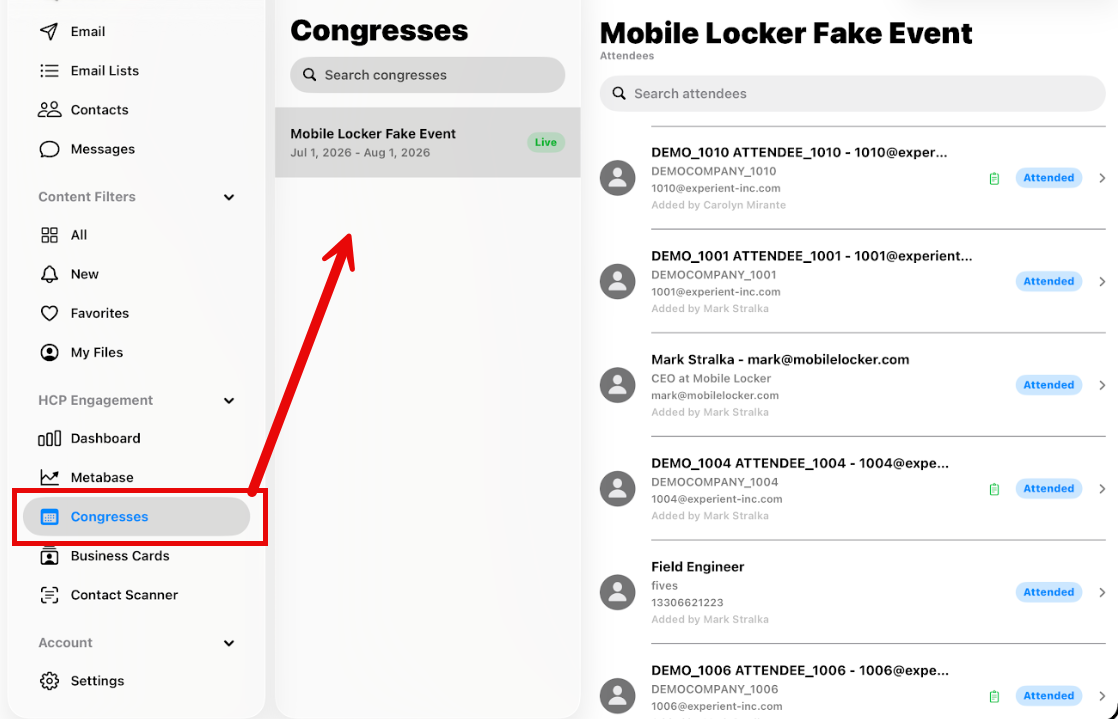
- Tap the + control (Capture lead).
- Tap Scan Attendee (shown when badge scanning is available for your team). You can also Enter Manually.
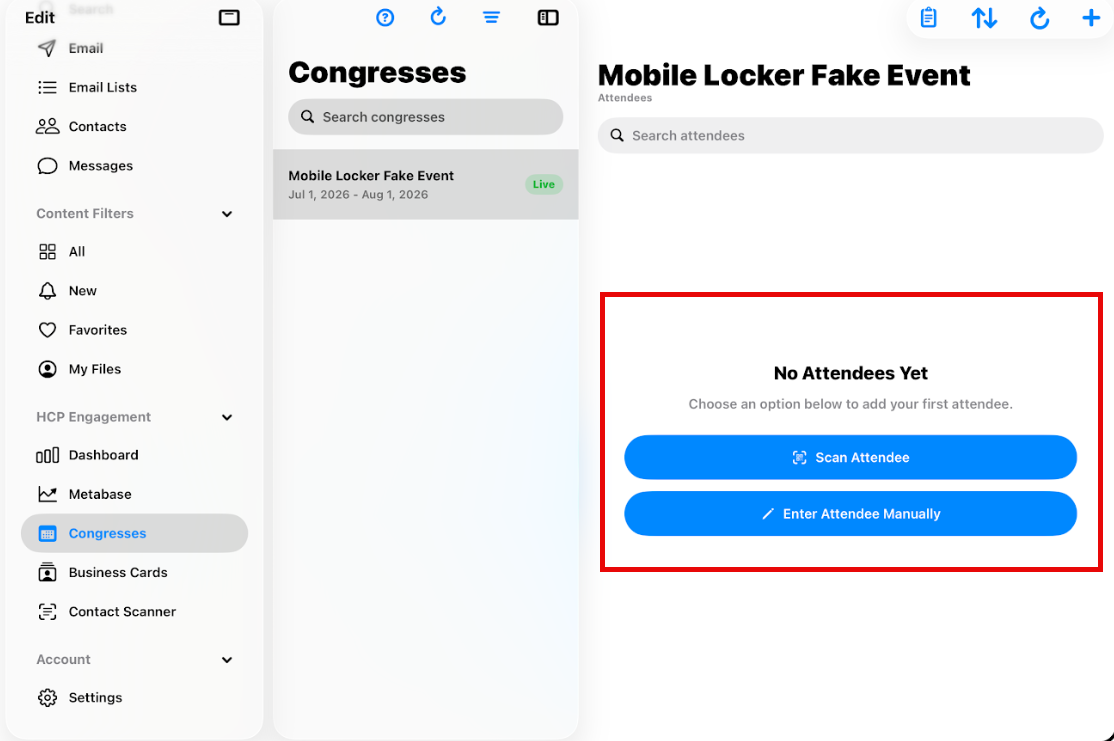
- Frame the badge or name text and capture. You can also Choose from Library or set Scan Language from the toolbar.
- What happens next depends on the photo:
- QR / barcode that your event’s lead retrieval can resolve — Mobile Locker looks up the badge and can create the attendee automatically (no Contact Scanner review step).
- No usable code, or no badge provider for the event — the app identifies the person from the text in the photo. The navigation title may show Identifying… while status text shows Reading text and identifying person…. Then you get Review Results.
You do not need to pick “AI mode.” Fallback is silent.


Review Results (AI / text path)
On Review Results you confirm identity before saving an attendee:
- Check the photo, name, company, job title, phone, email, LinkedIn, and address.
- Match status may show as Matched, Multiple Matches, No Match, Insufficient Info, and similar labels.
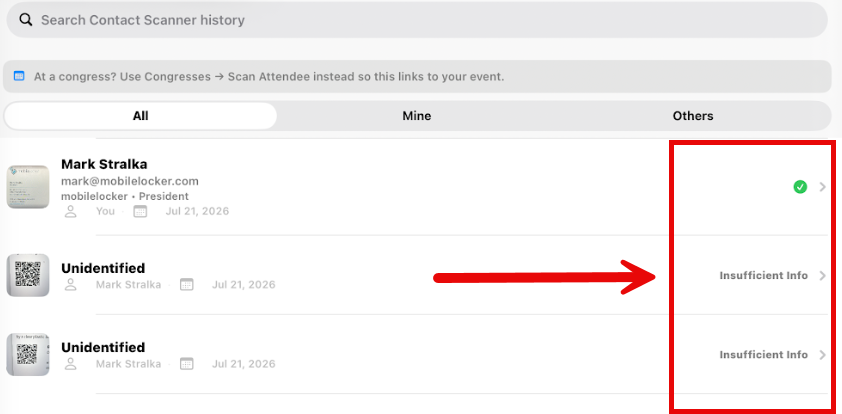
- If the photo text and enrichment data disagree on a field, choose From photo or From data partners.
- Fields that only enrichment filled may say Filled from data partners — tap to clear. Tap to clear if you want to enter the value yourself later.
- If you see Multiple Matches, use Choose Matching Person and pick the right person (Choose Person).
- Tap Review & Save Attendee (checkmark) to open the attendee form, finish any required fields, and save.
- Or tap Try Again if the photo was wrong—you will be asked to confirm discarding the current scan.
Tips
- At congresses with QR badges, aim for a clear code first—lead retrieval is usually faster and richer when the badge lookup succeeds.
- Use Contact Scanner (tab) for day-to-day contacts that are not event attendees; use Scan Attendee when the person should appear on the congress list.
- Set Scan Language when badges or cards are not in English.
- Good lighting and a sharp, complete frame of the text improve results.
Troubleshooting
| Problem | What to do |
|---|---|
| No Contact Scanner tab | Contact Scanner is a paid add-on and must be activated by Mobile Locker. Contact your account manager. Your team cannot turn it on in admin settings alone. |
| Message: Contact Scanner is not available for your team right now. | Add-on or service may be unavailable (temporary outage or configuration). Retry later, or contact your account manager / support. |
| Upload failed. Please check your connection and try again. | Check network and retry. |
| Identification is taking longer than expected. | Retry the scan when the connection is stable. |
| Camera Access Required | Enable camera access in iOS Settings for Mobile Locker, then try again. |
| No Scan Attendee under Capture lead | Badge scanning may not be enabled for your team. You can still Enter Manually. |
| Badge/QR scan fails with an error | Retry capture. Failed badge lookup does not automatically switch to AI; capture again without a code (plain name badge) if you need the text-identification path. |
| Wrong person or fields | On Review Results, switch From photo vs From data partners, clear partner-filled fields, or Choose Matching Person, then save. Use Try Again to recapture. |